Origami Flower Instructions PDF: A Comprehensive Guide
Discover step-by-step guides for creating beautiful origami flowers, from tulips to lotus blooms․ Each PDF includes clear diagrams, material lists, and folding techniques for all skill levels․
Welcome to the world of origami flower crafting! This guide provides a detailed journey through creating stunning origami flowers, from classic designs to intricate models․ Whether you’re a beginner or an experienced folder, you’ll find clear instructions to help you master various flower styles․ Explore step-by-step techniques, essential materials, and expert tips to bring your paper creations to life․ With patience and practice, you’ll craft beautiful blooms that inspire and delight․ Start your folding adventure today and discover the art of origami flowers!

Popular Types of Origami Flowers
Origami flowers come in various designs, each with unique beauty and complexity․ The tulip, lotus, narcissus, and kusudama are among the most popular․ Tulips are simple yet elegant, standing independently․ Lotus flowers often require square paper and precise folding․ Narcissus designs involve intricate layers, while kusudama flowers use multiple units to create stunning 3D blooms․ Each type offers a distinct challenge and aesthetic appeal, making them favorites among origami enthusiasts․ Explore these designs to find your perfect floral creation!
2․1 Tulip Flower
The tulip is one of the most popular origami flowers, known for its simplicity and elegant design; It stands upright on its own, making it a favorite for displays․ To create a tulip, start with a square paper, fold it diagonally, and form a triangular base․ Use green paper for the stem and leaves for a realistic touch․ The tulip’s petal structure requires precise folding and creasing to achieve its signature cup-shaped bloom․ This design is perfect for beginners and experienced folders alike, offering a satisfying result․
2․2 Lotus Flower
The lotus flower is a stunning and symbolic origami model, known for its intricate layers and realistic appearance․ To create a lotus, begin with a square piece of paper, ensuring the blank side faces you․ Fold the corners outward from the center and crease well․ The process involves multiple layers to mimic the flower’s natural bloom․ The larger the paper, the more detailed the lotus can be, making it easier to achieve the desired shape․ This design is perfect for those looking to create a visually striking and meaningful origami piece․
2․3 Narcissus Flower
The narcissus flower is a popular origami model known for its simplicity and elegance․ Designed by Joost Langeveld and diagrammed by Marcio Noguchi, this flower requires 14 detailed steps to create․ Starting with a square piece of paper, the process involves precise folds to shape the petals and center․ The instructions are clear and easy to follow, making it accessible for both beginners and experienced folders․ The narcissus is a timeless choice, offering a beautiful result with minimal complexity․ A free printable PDF guide is available for download, ensuring a smooth folding experience․
2․4 Kusudama Flower
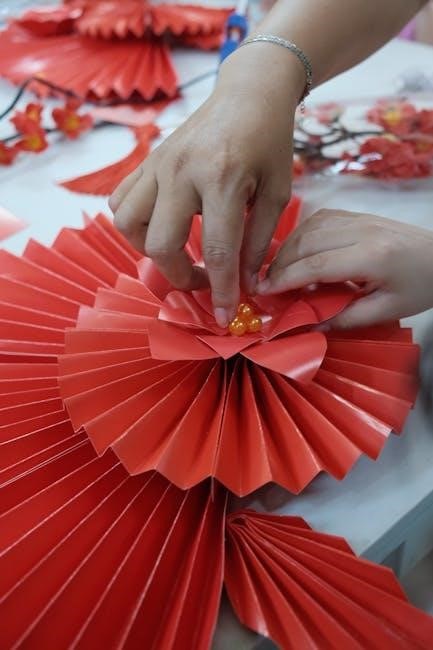
The kusudama flower is a stunning modular origami design, often created by assembling multiple units into a spherical shape․ Known for its complexity and beauty, it requires patience and precision․ Instructions typically include detailed diagrams for crafting individual petals and assembling them into the final form․ While challenging, the result is highly rewarding․ Free diagrams and videos are available online, offering guidance for mastering this intricate design․ The kusudama flower is a perfect project for those seeking to explore advanced origami techniques and create visually striking pieces․
Materials Needed for Origami Flowers
To create origami flowers, you’ll need a few essential materials․ Start with square origami paper, typically available in various colors and patterns․ Choose kami or washi for durability and a professional finish․ A bone folder or similar tool is useful for creating sharp creases, while a ruler helps measure and align folds․ Optional items include scissors for trimming edges and glue for assembling complex designs like kusudama flowers․Having the right materials ensures crisp folds and a polished final result․
3․1 Choosing the Right Paper
Selecting the right paper is crucial for origami flowers․ Opt for square sheets, as they are standard for most designs․ Kami or chiyogami paper is ideal due to its vibrant colors and smooth texture․ For beginners, thicker paper provides stability, while experienced folders may prefer thinner washi paper for intricate details․ Ensure the paper’s size matches your desired flower size; larger sheets are easier to handle but require more folds․ The color and pattern should reflect the flower’s natural appearance, enhancing its realism and appeal․
3․2 Tools for Folding
Essential tools for origami flower folding include a flat surface, a bone folder or similar blunt tool for sharp creases, and scissors for trimming paper․ Tweezers can help shape small petals, while a pencil aids in marking folds․ Optional items like a cutting mat and ruler enhance precision․ These tools ensure clean folds and precise details, making the folding process smoother and the final result more professional․ They are often highlighted in PDF guides as must-haves for achieving intricate designs and realistic flower appearances․
Basic Origami Techniques
Mastering basic origami techniques is crucial for creating realistic flowers․ Start with the square base, a fundamental fold used in most designs․ Next, learn the waterbomb base, which forms a triangular shape essential for petals․ Practice valley folds (folding down) and mountain folds (folding up) to create depth and structure․ These techniques lay the groundwork for more complex steps like petal shaping and layering․ With patience, these foundational skills will help you craft stunning origami flowers that look lifelike and intricate․
4․1 Folding the Square Base
Folding the square base is a foundational step in origami flower creation․ Begin with a square piece of paper, white side up․ Fold it in half vertically, crease well, and open․ Repeat horizontally to create a cross crease․ These lines guide symmetrical folding․ Fold the paper diagonally to form a triangle, then fold again to create a smaller triangle․ This base is essential for petals and layers in various flower designs, ensuring stability and evenness in your final piece․ Practice this step for precise results․
4․2 Creating the Waterbomb Base
The waterbomb base is a classic origami technique used to create layered structures, ideal for flowers․ Start with a square paper, colored side down․ Fold the top right corner to the bottom left, forming a diagonal crease․ Flip the paper and repeat with the other diagonal․ Fold the corners to the center, creating a smaller square․ Turn the paper over and fold the corners again to form a waterbomb shape․ This base allows for easy layering of petals and details, essential for realistic flower designs․
Step-by-Step Folding Instructions
Begin with a square sheet of paper, ensuring the colored side faces down․ Fold the paper diagonally to form a triangle, then unfold and repeat in the opposite direction․ Fold the top edges to the center line, creating a kite shape․ Next, fold the bottom corners up to meet the center, forming a smaller triangle․ Turn the paper over and repeat the process for symmetry․ Continue by folding the outer edges inward to create petal shapes, ensuring crisp creases for definition; Follow each step carefully to achieve a lifelike flower design, perfect for decorations or gifts․
5․1 Folding the Paper into a Flower Shape
Start by folding the paper in half diagonally to create a triangle, then unfold and repeat in the opposite direction․ This forms a crease that serves as a guide․ Fold the top corners down to the center line, creating a kite shape․ Next, fold the bottom corners up to meet the center, forming a smaller triangle․ Turn the paper over and repeat the process to ensure symmetry․ Finally, fold the outer edges inward to create layered petal shapes, refining the edges for a natural flower appearance․ Precision and patience are key to achieving a realistic bloom․
5․2 Adding Petals and Details
Once the base flower shape is formed, focus on creating and attaching individual petal shapes․ Fold each petal separately, ensuring they match in size and shape for consistency․ Attach them around the center by tucking the edges under the base layer․ Use delicate folds to shape each petal, creating a natural curve․ For added realism, refine the center by folding inward to form a stigma or other central details․ Adjust the petals slightly to ensure a balanced and lifelike appearance, completing the flower with precision and care․
Advanced Techniques for Realistic Flowers
Elevate your origami flowers with detailed layering and shaping techniques․ Use multiple layers of petals to mimic natural blooms and refine edges for a softer appearance․ Experiment with paper textures and colors to enhance realism․ Advanced folding methods, like creating subtle curves and three-dimensional details, add depth and authenticity․ Incorporate small accents, such as a central bead or stamen, to complete the look․ Practice precision and patience to master these intricate steps, transforming simple folds into breathtakingly realistic floral designs․
6․1 Layering Petals
Layering petals adds depth and realism to origami flowers․ Begin by folding multiple petal units separately, ensuring each has a natural curve․ Stack them around the flower’s center, securing with a small dab of glue․ Vary petal sizes and angles for a lifelike appearance․ Use a blunt tool to shape each petal’s edge gently, creating soft ripples․ This technique works well for roses, peonies, and other multi-petaled flowers․ With practice, layered petals will give your creations a stunning, professional finish․
6․2 Shaping the Center

Shaping the center of your origami flower is crucial for realism․ Start by folding the base into a tight coil or ball, securing it with a small dot of glue․ For a more natural look, use a toothpick or similar tool to gently indent the center, mimicking the texture of real flower stamens․ Adjust the shape as needed to ensure symmetry․ For added detail, layer a small circle of paper in the center, folding its edges outward to create a 3D effect․ This step enhances the flower’s visual appeal and authenticity․
Downloading Origami Flower Instructions PDF
Downloading origami flower instructions in PDF format is convenient and accessible․ Websites like Etsy and Amazon offer high-quality, printable guides with detailed diagrams․ Many free resources are available, such as the NARCISSUS Origami Instructions by Joost Langeveld․ These PDFs often include step-by-step folding techniques, material lists, and tips for creating realistic flowers․ Ensure you have Adobe Reader to open these files․ Downloading a PDF allows you to follow along at your own pace, making it ideal for both beginners and experienced folders․ This format ensures clarity and ease of use․
7․1 Free Printable PDF Guides
Free printable PDF guides for origami flowers are widely available online․ Websites offer downloadable instructions with clear diagrams and step-by-step folding techniques․ These guides often include designs like tulips, lotus, and narcissus flowers․ Many creators, such as Joost Langeveld, provide free PDFs with detailed folding sequences․ Some sites require Adobe Reader for access․ These guides are perfect for beginners, offering easy-to-follow instructions and material lists․ They allow you to practice at your own pace, making origami accessible to everyone․ Downloading these PDFs is a great way to start your origami journey․
7․2 Websites Offering Origami Flower Diagrams
Websites like www․kusudama․me offer extensive collections of origami flower diagrams and videos․ These sites provide clear, step-by-step visual guides for models such as lotus, tulip, and narcissus flowers․ Many platforms also include free downloadable PDFs with detailed folding instructions․ Some websites specialize in advanced techniques, sharing diagrams for intricate designs like layered petals and realistic centers․ These resources are ideal for both beginners and experienced folders, offering a variety of styles and complexity levels to suit every skill set․ Explore these sites to enhance your origami skills․
Tips for Beginners
Start with basic folds and practice patience, as origami requires precision and time․ Use square paper for simplicity and follow diagrams closely․ Begin with simple models like tulips before moving to complex designs․ Work in a quiet, distraction-free space to focus․ Don’t rush—each fold builds the foundation for the next․ If mistakes occur, gently unfold and try again․ Keep paper smooth to avoid creases․ Celebrate progress, no matter how small, and enjoy the therapeutic process of creating something beautiful with your hands․
8․1 Following Diagrams
Following diagrams is essential for beginners, as they provide visual guidance for each fold․ Start by carefully studying the sequence of steps before folding․ Use the diagrams to identify key creases and reference points․ Focus on one step at a time to avoid confusion․ If diagrams seem complex, look for resources with enlarged visuals or video tutorials․ Practice patience and don’t skip steps, as each fold builds upon the last․ By closely following diagrams, you’ll achieve the desired shape and enjoy the satisfaction of creating beautiful origami flowers․
8․2 Practicing Patience
Patience is crucial when mastering origami flowers․ Each fold requires precision, so take your time to ensure every crease is sharp and accurate․ Avoid rushing, as this can lead to mistakes or misshapen petals․ If frustration arises, pause and revisit the step later with a fresh perspective․ Celebrate small progress and remember that practice improves skill․ By embracing patience, you’ll enjoy the therapeutic process and create stunning, intricate designs that reflect your dedication and care․
Troubleshooting Common Mistakes
Common mistakes in origami flower-making include uneven petals or a misaligned center․ To fix uneven petals, gently adjust each fold to ensure symmetry․ If the center doesn’t hold, reinforce it with an extra fold or tuck․ Creases that are too shallow can cause petals to droop, so deepen them carefully․ For misshapen blooms, start over with precise folds․ Remember, practice helps refine your technique․ Patience and attention to detail will lead to stunning, professional-looking flowers that showcase your skill and dedication to the craft․
9․1 Fixing Uneven Petals
Uneven petals can be corrected by carefully examining each fold․ Gently adjust asymmetrical areas by refolding or tucking edges to align properly․ Ensure all creases are sharp and symmetrical․ If a petal is too large or small, compare it to others and adjust folds to match․ Sometimes, starting over with a fresh square base helps achieve uniformity․ Patience is key; slight adjustments can make a significant difference in the final appearance of your origami flower․ This step ensures your blooms look balanced and professional․
9․2 Adjusting the Center

The center of an origami flower is crucial for its shape and symmetry․ To adjust it, ensure all folds align properly and the center is tight․ Use a bone folder to create sharp creases, which helps in maintaining the structure․ If the center feels too loose, gently pull the paper to tighten it․ Conversely, if it’s too tight, carefully loosen the folds․ Proper adjustment ensures the flower holds its form and the petals align beautifully, enhancing the overall appearance of your origami creation․
With these detailed instructions, you’re now equipped to create stunning origami flowers․ From tulips to lotus blooms, each fold brings you closer to crafting beautiful designs․ Remember, patience and practice are key to mastering these techniques․ Whether you’re a beginner or an advanced folder, the step-by-step guides and downloadable PDFs provide everything needed to refine your skills․ Embrace the art of origami and enjoy the satisfaction of transforming paper into elegant floral creations that inspire and delight․